Deploying the Application: A Grand Adventure
Reader Beware. We wanted to test the humour capabilities of Gemini as it generated this document. It can be a bit unbearable. Alternatively, you can read the official documentations for each technology, which will be linked at the beginning of each section.
Welcome, brave developer, to the epic saga of deploying the TutorLM application! This guide will be your trusty map and compass, leading you through the mystical lands of Flutter, the fiery plains of Firebase, and the sometimes-perplexing realm of mobile emulators. Fear not, for with great detail (and a dash of humor), we shall conquer these challenges together!
Setting up Flutter: Wielding the Power of Widgets
You can find the official Flutter installation guide at https://flutter.dev/docs/get-started/install.
Flutter, oh Flutter, how thou art wondrous! It's the UI toolkit from Google that lets you build beautiful, natively compiled applications for mobile, web, and desktop from a single codebase. Think of it as the "One Ring" for app development, but, you know, less evil and more about pretty UIs.
Prerequisites: Gathering Your Adventurer's Kit
Before you embark on this quest, make sure you have the right gear:
- A Trusty Steed (Operating System): macOS 10.14 (Mojave) or later. Windows and Linux are also supported, but this guide focuses on the path of the Mac.
- The Magical Xcode: Version 12.0 or newer. This is your gateway to the iOS realm. You can find it in the Mac App Store – it's a big download, so maybe grab a coffee (or three).
- The Android Studio Grimoire: For conjuring Android emulators and tools. Download it from the ancient scrolls at developer.android.com/studio.
- Git, the Version Control Bard: To keep track of your epic journey's progress. If you don't have it, you're probably a wizard already and don't need this guide.
Installation Steps: The Ritual Begins
-
Summoning the Flutter SDK: Open your terminal (it's like a magic wand for developers) and chant the following incantation:
cd ~/development # Or your preferred scroll repository
git clone https://github.com/flutter/flutter.git -b stable
This clones the Flutter SDK into a
flutterdirectory. It's like planting a seed that will grow into a mighty tree of app-building power! -
Enchanting Your PATH: To make Flutter accessible from anywhere, you need to add it to your PATH. It's like telling your computer, "Hey, remember this cool Flutter thing? I'm gonna need it a lot." Edit your shell's profile file (likely
~/.zshrcif you're on a modern Mac, or~/.bash_profilefor older incantations):export PATH="$PATH:$HOME/development/flutter/bin"Self-deprecation alert: If you're like me and always forget which shell you're using, just try both! One of them will work. Probably. Then, whisper the ancient words to reload your shell:
source ~/.zshrc # Or source ~/.bash_profile -
Consulting the Oracle (Flutter Doctor): Run the
flutter doctorcommand. This mystical tool will diagnose your system and tell you if any ancient relics (dependencies) are missing.flutter doctorIt will present a summary, possibly with some red 'X' marks. Don't panic! These are just side quests. (Imagine a doctor with a stethoscope, but instead of listening to your heart, it's checking your SDKs. "Hmm, looks like you're low on Android toolchain...")
-
Acquiring Missing Artifacts (Dependencies):
- Xcode: If
flutter doctorcomplains about Xcode, ensure it's installed from the App Store and that you've run it at least once to accept its terms. - Android Studio: Install it, then run through its setup wizard.
flutter doctorwill also likely ask you to install the Android SDK, command-line tools, and build tools. Follow its guidance! - Android Licenses: A peculiar ritual, but necessary.
Press 'y' to everything. You're basically signing a peace treaty with the Android spirits.
flutter doctor --android-licenses
- Xcode: If
-
Empowering Your Scribe (IDE Configuration): Whether you wield VS Code or Android Studio as your primary coding weapon, you'll want the Flutter and Dart plugins. They provide syntax highlighting, code completion, and other magical aids.
- VS Code: Go to Extensions (the little Tetris block icon), search for "Flutter" and "Dart", and install them.
- Android Studio: File > Settings (or Android Studio > Preferences on macOS) > Plugins. Search for "Flutter" and install it (Dart comes along for the ride).
You are now a fledgling Flutter sorcerer! Go forth and create UIs that would make even the grumpiest troll smile.
Setting up Firebase: Forging Your Backend in Dragon's Fire
You can find the official Firebase setup guide for Flutter at https://firebase.google.com/docs/flutter/setup as well as the official FlutterFire CLI documentation at https://firebase.flutter.dev/docs/cli.
Firebase is your backend-as-a-service, your loyal companion for handling all the messy server-side stuff like authentication, databases, storage, and more. Think of it as having a team of highly efficient (and invisible) gnomes working tirelessly behind the scenes of your app.
Creating a Firebase Project: Claiming Your Digital Kingdom
-
Journey to the Firebase Console: Navigate your browser to the legendary console.firebase.google.com. If you don't have a Google account, well, this might be a good time to join the 21st century (or just create one for Firebase, we don't judge).
-
Erecting Your Fortress (Create New Project):
- Click the prominent "Create a project" button. It's usually big and inviting, like a castle gate.
- Bestow a name upon your kingdom (e.g., "tutorlm-app-the-mighty").
- Decide if you want to enlist the services of Google Analytics, the all-seeing eye. It's useful, but optional.
- If you opt for Analytics, choose or create an account.
Behold! Your Firebase project is born. It's a bit empty now, like a castle without a king, but we'll soon populate it with services.
Binding Flutter and Firebase: The Unbreakable Vow
Now, we must link your Flutter app with your new Firebase kingdom. This requires the mystical FlutterFire CLI.
-
Installing the Firebase Emissary (Firebase CLI): If you haven't already, install the Firebase Command Line Interface. It's like a direct communication line to your Firebase gnomes.
npm install -g firebase-tools(If
npmsounds like a strange incantation, it's from the Node.js world. You might need to install Node.js first if you don't have it. It's a whole other adventure!) -
Pledging Allegiance (Login to Firebase):
firebase loginThis will open your browser and ask you to log in with your Google account. Grant it permission, and the gnomes will know you're the rightful ruler.
-
Summoning the FlutterFire Herald (FlutterFire CLI): This Dart-powered tool is specifically for Flutter and Firebase.
dart pub global activate flutterfire_cliMake sure your Dart SDK's
pub globalexecutables are in your PATH. If not, the command output will usually tell you how to add them. It's like another PATH enchantment, but for Dart's special tools. -
The Configuration Ritual (Configure Firebase in Your Flutter Project): Navigate to your Flutter project's root directory in the terminal (the one with
pubspec.yaml). Then, invoke the FlutterFire herald:cd /Users/domain/Projects/cmpt355/tutorlm # Your project's sacred ground
flutterfire configureThis is a powerful spell! It will:
- Ask you to select your Firebase project from a list (the one you just created).
- Ask which platforms (iOS, Android, Web, macOS) you want to configure. Choose wisely!
- Magically generate a
firebase_options.dartfile in yourlibfolder. This file contains the sacred keys to your Firebase kingdom. Guard it well (but also commit it to version control, it's not that secret).
If you later decide to add support for a new platform or use a new Firebase service, you might need to re-run
flutterfire configure. The gnomes appreciate being kept in the loop.
Awakening the Firebase Services: Equipping Your Castle
Your Firebase project is like a castle with many rooms. Let's furnish some of the important ones.
-
The Gatekeeper (Authentication):
- In the Firebase Console, navigate to "Authentication" (usually under "Build" in the sidebar).
- Click "Get started."
- Enable the sign-in methods you desire. Email/Password is a classic. Google Sign-In is fancy. The more, the merrier (and the more complex your login screen, ha!).
-
The Royal Archives (Firestore Database):
- Go to "Firestore Database" (also under "Build").
- Click "Create database."
- You'll be asked about security rules. For development, you can start in test mode, which is like leaving the castle gates wide open. Remember to secure these rules before deploying to production, or dragons (hackers) might steal your treasure!
- Choose a location for your data. Pick one close to your users, or just one that sounds cool.
-
The Treasure Vault (Storage):
- Find "Storage" under "Build."
- Click "Get started."
- Again, you'll configure security rules. Similar to Firestore, start with test mode for now, but promise the gnomes you'll tighten security later.
-
The Messenger Ravens (Cloud Functions - Optional): If you need custom server-side logic (like sending a welcome raven... er, email... when a user signs up), you'll need Cloud Functions. In your project directory:
firebase init functionsChoose TypeScript or JavaScript. TypeScript is like learning Elvish – a bit more effort, but very elegant.
Adding Firebase Runes to Your Flutter Grimoire (Dependencies)
Your Flutter app needs to know how to speak "Firebase." Add these dependencies to your pubspec.yaml file. It's like adding new spells to your spellbook.
dependencies:
  flutter:
    sdk: flutter
  # ... other dependencies ...

  firebase_core: ^2.24.2 # The heart of Firebase
  firebase_auth: ^4.15.3 # For the Gatekeeper
  cloud_firestore: ^4.13.6 # For the Royal Archives
  firebase_storage: ^11.5.6 # For the Treasure Vault
  # Add other Firebase plugins as needed, like firebase_messaging, firebase_analytics, etc.
A word of caution, brave adventurer: these version numbers are like ancient prophecies, they change over time! Always check the latest recommended versions on pub.dev (Flutter's official package repository) or the FlutterFire documentation.
After adding these lines, run the incantation to fetch the new spell components:
flutter pub get
Finally, you need to initialize Firebase in your app. This is like performing the grand opening ceremony for your Firebase-powered features.
In your lib/main.dart file, before runApp():
import 'package:firebase_core/firebase_core.dart';
import 'firebase_options.dart'; // The sacred keys!

void main() async { // Make main async
  WidgetsFlutterBinding.ensureInitialized(); // Ensures Flutter is ready
  await Firebase.initializeApp(
    options: DefaultFirebaseOptions.currentPlatform, // Uses the generated options
  );
  runApp(MyApp());
}
And there you have it! Your Flutter app and Firebase are now best buddies, ready to build amazing things together. Just try not to start any accidental magical fires.
Setting up iOS Emulator or Android Emulator: Peering into Other Dimensions
Emulators are your crystal balls, allowing you to see how your app will look and behave on different devices without actually owning a mountain of phones (though, if you do, we're not judging, just a little jealous).
The iOS Simulator: Gazing into the Apple Orchard
To peer into the iOS dimension, you'll need Xcode.
Prerequisites: The Apple Cart
- Xcode: Installed and happy.
- macOS: Because Apple likes to keep its magic within its own walled garden.
Installation & Conjuring Steps:
-
Awaken Xcode: Launch Xcode. If it's the first time, it might do some initial setup. Let it. It's probably communing with the Apple spirits.
-
Summoning Simulators:
- In Xcode, go to Window > Devices and Simulators.
- Click the "Simulators" tab. You should see a list of available simulators.
- If you need more, or different iOS versions, click the "+" button at the bottom left to create a new one. Choose a device type (e.g., "iPhone 15 Pro") and an OS version.
- Pro-Tip: It's good to have a couple of different simulators: one with the latest iOS and maybe an older one for compatibility checks. Like having both a modern crystal ball and an ancient, slightly cracked one.
-
Launching the Portal (Simulator): You can launch a simulator directly from Xcode by selecting it from the target device dropdown (usually at the top of the Xcode window, next to the play/stop buttons) and hitting the play button. Or, from your terminal, once Flutter knows about it:
flutter emulators --launch apple_ios_simulator # If you only have one
# Or, to list them:
# flutter emulators
# And then launch by ID:
# flutter emulators --launch <simulator_id>
Alternatively, you can just run your Flutter app and specify the simulator:
flutter runIf a simulator is running, Flutter will usually pick it. If multiple are running, or none, it might ask you to choose.
-
Testing Your App in the Orchard: With a simulator running,
flutter runwill install and launch your app on it. It's like sending a magical projection of your app into the Apple dimension!
The Android Emulator: Venturing into the Green Robot's Lair
For the Android dimension, Android Studio is your guide.
Prerequisites: The Droidsmith's Tools
- Android Studio: Installed and configured with the Android SDK.
- Patience: Sometimes, the Android Emulator can be a bit... temperamental. Like a grumpy but lovable robot.
Installation & Conjuring Steps:
-
Enter the AVD Manager (Android Virtual Device Manager):
- In Android Studio, go to Tools > AVD Manager. Or look for an icon that looks like a phone with a little Android on it.
- This is your workshop for creating and managing Android emulators.
-
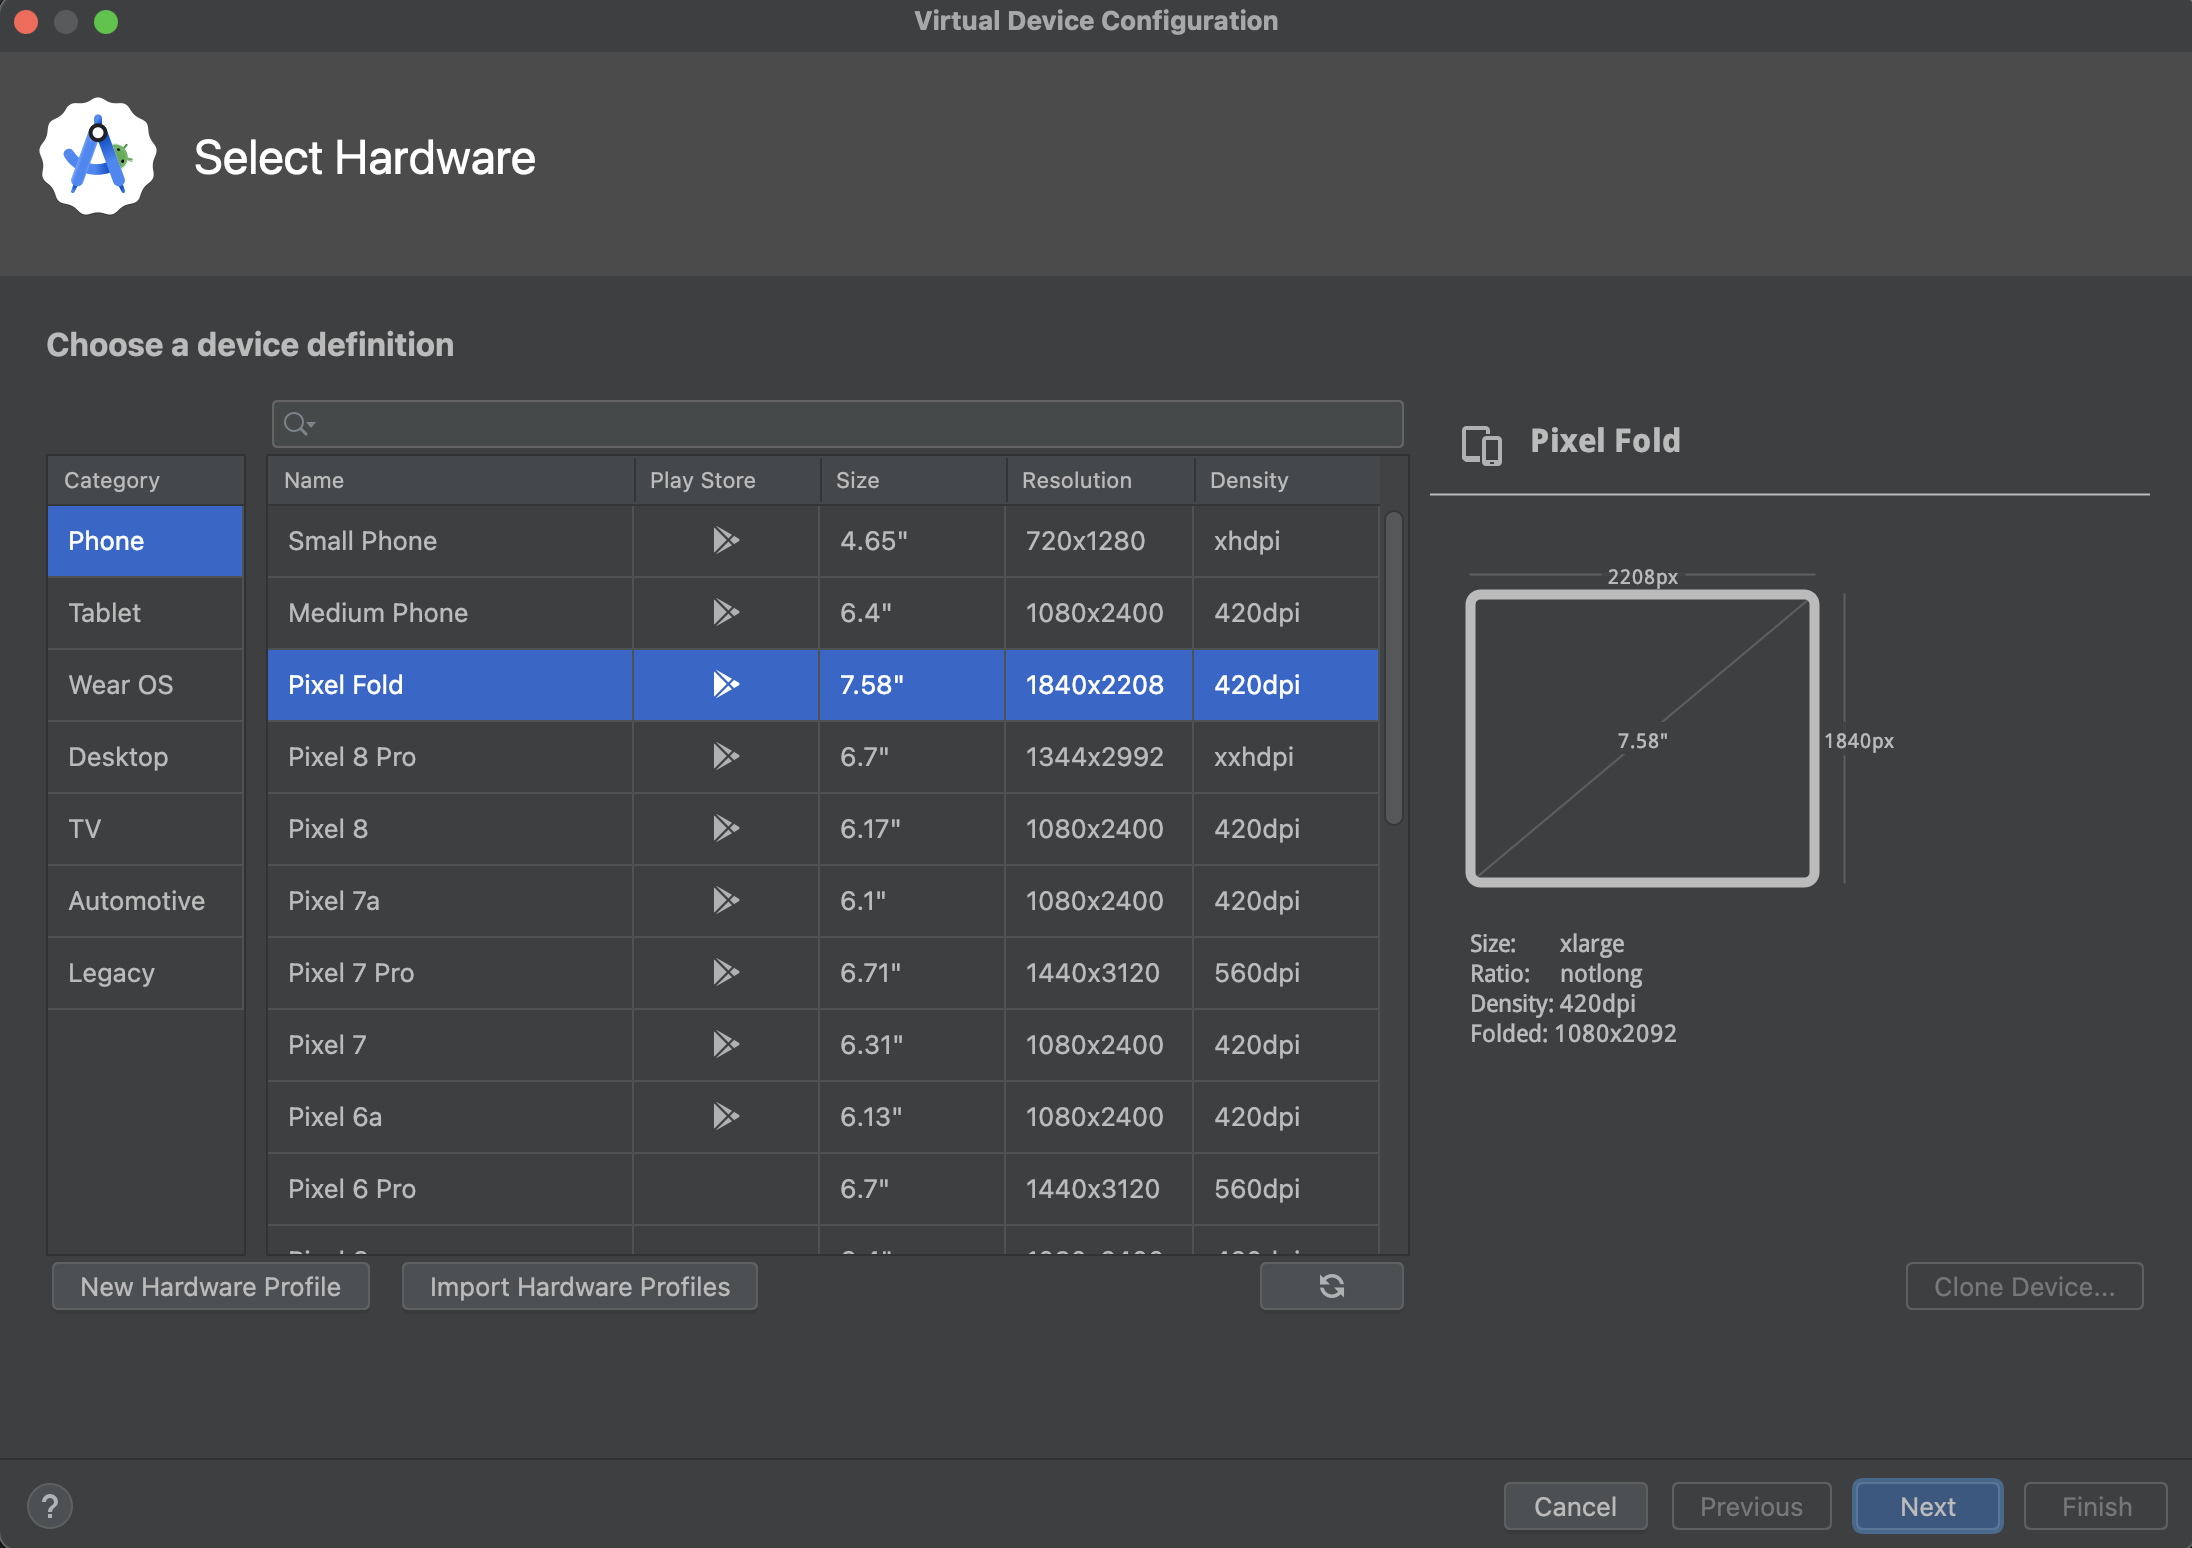
Crafting Your Virtual Droid:
- Click "+ Create Virtual Device..."
- Choose a Device Definition: Select a hardware profile. Pixel devices are good defaults. Look for ones with the "Play Store" icon if you need Google Play Services in your emulator (many apps do!).
(It's like choosing the chassis for your custom robot.)
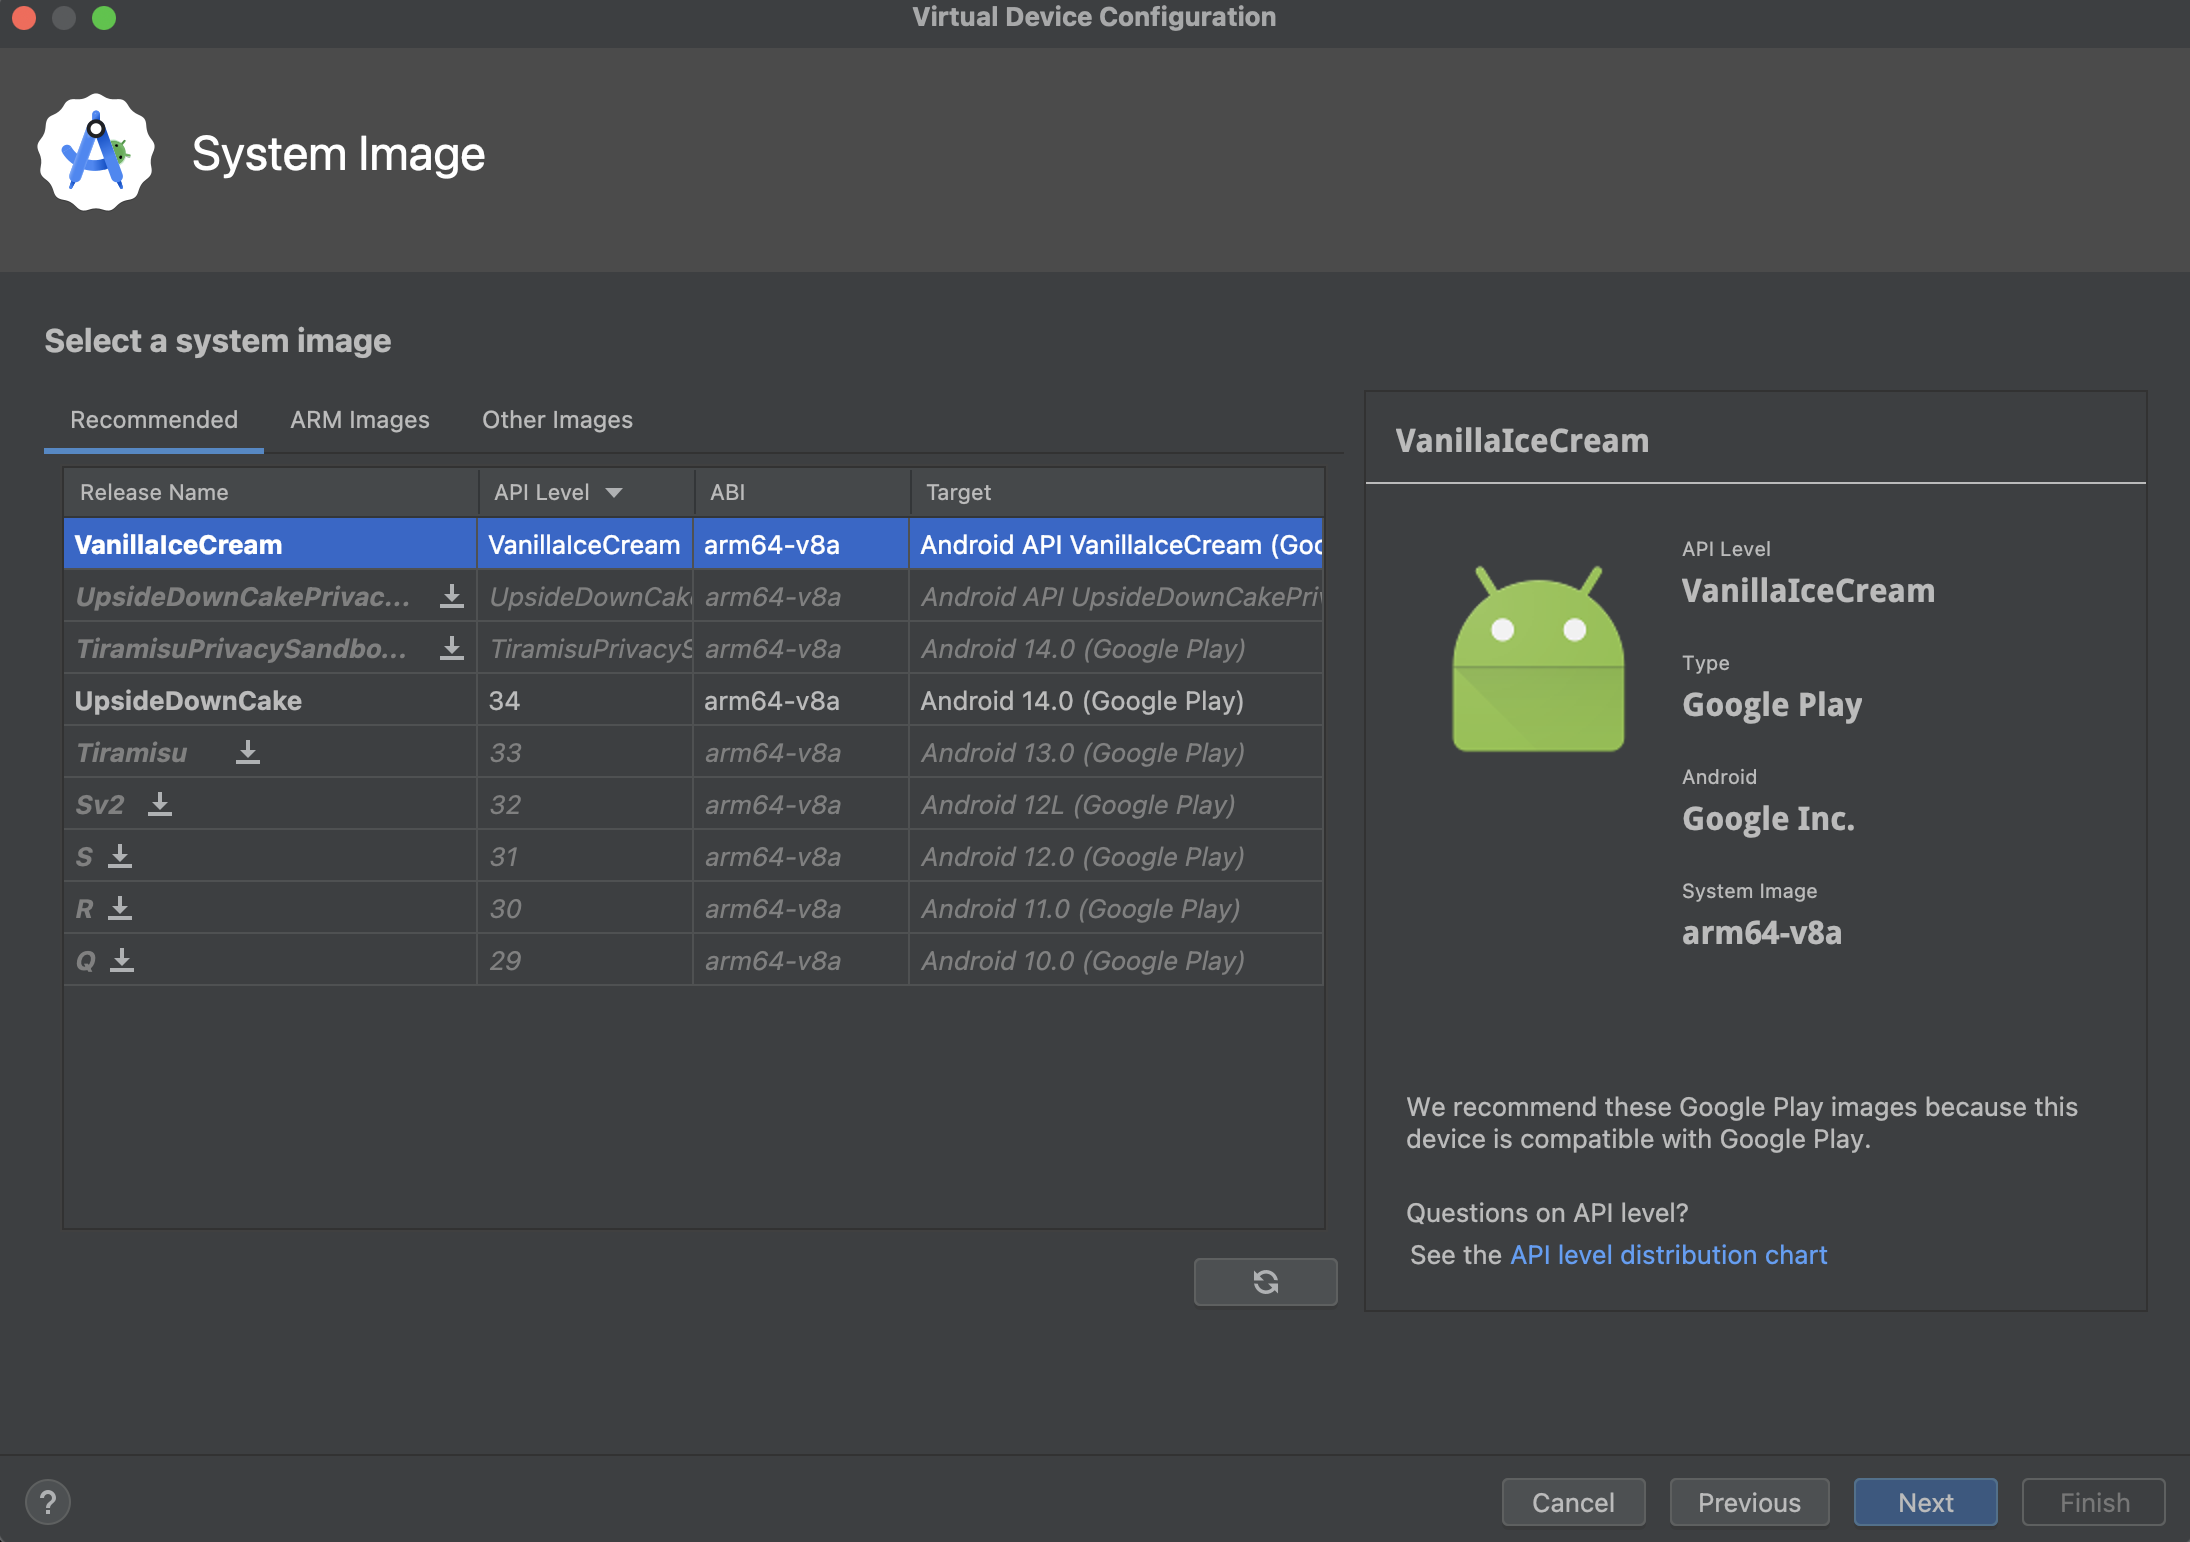
- Select a System Image: This is the Android OS version your emulator will run.
- Go to the "Recommended" tab or browse "x86 Images" or "Other Images."
- Pick an API level (e.g., API 33 or 34). If the image has "(Google APIs)" or "(Google Play)" in its name, it includes Google services.
- If the image you want isn't downloaded, you'll see a download link. Click it and grab another coffee. These can be chunky.
(This is like choosing the brain for your robot.)
- Verify Configuration: Give your AVD a name. You can tweak advanced settings like RAM, storage, and camera options here, but the defaults are usually fine to start. Click "Finish." (Now you're just polishing your robot and giving it a cool name, like "DroidyMcDroidFace.")
-
Awakening Your Droid:
- Back in the AVD Manager, you'll see your newly created AVD. Click the green play button in the "Actions" column to launch it.
- The first boot can be slow. It's like the robot is stretching and yawning after a long nap. Subsequent boots are usually faster, especially if Quick Boot is enabled.
-
Testing Your App in the Lair: Similar to iOS, with an Android emulator running:
flutter runFlutter will detect the running emulator and deploy your app. You'll see your creation come to life on a virtual Android device! It's alive! ALIVE! (Too much?)
General Emulator Shenanigans and Tips:
flutter devices: This command is your friend. It lists all connected devices and running emulators/simulators that Flutter can see.- Performance: Emulators can be resource-hungry. Close unnecessary applications on your computer if things get sluggish. Ensure hardware acceleration (VT-x or AMD-V) is enabled in your computer's BIOS/UEFI if you're on Windows/Linux and using Android Emulators. Macs usually handle this well out of the box.
- "It's not working!": The classic developer lament.
- Restart the emulator.
- Restart Android Studio / Xcode.
- Restart your computer (the ancient ritual of "turning it off and on again").
- Consult
flutter doctoragain. - Check for error messages in your IDE's console or the terminal. They often contain cryptic clues.
- Google the error message. Someone, somewhere, has probably faced the same demon.
Deployment Commands: Unleashing Your Creation Upon the World!
Okay, so "world" might be an exaggeration for now. Let's start with "your own devices" and then "the app stores."
Development: The Alchemist's Lab
During development, you'll mostly use flutter run.
# Run on the currently active/selected device/emulator
flutter run

# Want to be specific? List 'em first!
flutter devices

# Then run on a specific one (use the device ID from the list)
flutter run -d <device_id_here>
# e.g., flutter run -d emulator-5554
# e.g., flutter run -d 'iPhone 15 Pro'
- Hot Reload (R): While
flutter runis active in your terminal, pressr. Flutter will magically inject your code changes into the running app without losing its current state. It's like changing the engine of a car while it's still driving. (Don't try that in real life.) - Hot Restart (Shift + R): Press
Shift + R. This is a bit more drastic. It rebuilds the app's state but is still faster than a full stop and restart.
Building for Release: Preparing for the Grand Ball
When your app is polished and ready to meet the world (or at least, the app store reviewers), you'll need to create a release build.
iOS: The Apple Gala
# Create a release build for iOS
flutter build ios --release
This creates an optimized build in your build/ios/iphoneos/ directory.
To actually submit to the App Store, you'll typically use Xcode to archive and upload. The flutter build ipa command can also be useful for ad-hoc distribution or some CI/CD setups:
flutter build ipa
This generates an .ipa file, which is the package format for iOS apps.
Android: The Robot Uprising (in a good way)
# Build a release APK (older format, still useful for direct installs/testing)
flutter build apk --release
This creates an optimized APK in build/app/outputs/flutter-apk/app-release.apk.
For publishing to the Google Play Store, it's highly recommended to build an Android App Bundle (.aab):
# Build an Android App Bundle (preferred for Google Play)
flutter build appbundle --release
This creates an .aab file in build/app/outputs/bundle/release/app-release.aab. App Bundles allow Google Play to deliver optimized APKs for each user's device configuration, saving download size. It's like a magical shrinking potion for your app!
Important Note for Release Builds: You'll need to configure code signing for both iOS (Apple Developer Program membership, certificates, provisioning profiles) and Android (keystore). This is a whole other chapter in the deployment saga, often filled with its own trials and tribulations. Consult the official Flutter, Apple, and Android documentation for these sacred rites. They are crucial, lest your app be rejected by the app store gatekeepers!
And so concludes our grand tour of the TutorLM deployment process! You've faced Flutter, tamed Firebase, and peered into the emulated dimensions. May your builds be swift, your bugs be few, and your users be delighted. Go forth and deploy with confidence, brave developer! If you get lost, remember: the official documentation is your most trusted map, and the developer community is your fellowship. Happy coding!